RootBeer Laptop Sleeve - Free Pattern
RootBeer Laptop Sleeve
Free Crochet Pattern
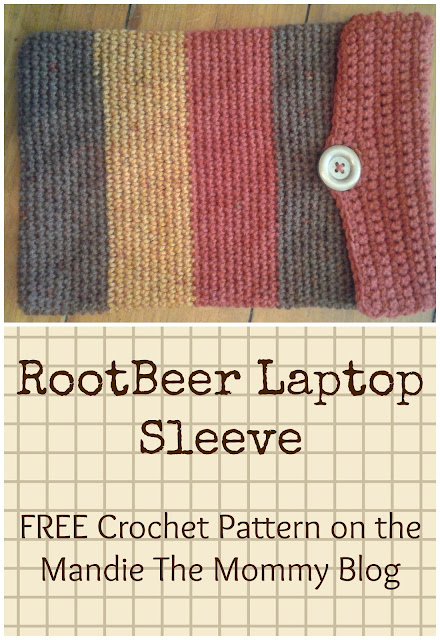
Happy Monday everyone! This week's yarn review will be a little delayed, because I'm bringing you a pattern instead! I do all my posting from a little 13" Macbook. With two little kiddos running around my house, my laptop gets so many fingerprints and smudges! So, I designed a simple sleeve to keep it in when it's not in use. The pattern is easily adjusted for laptops of different sizes and even for tablets, too! It's named for this adorable colorway of Sweet Roll Yarn. Enjoy!
You can purchase a downloadable version on Ravelry here: Ravelry Link
Remember to add your projects; I love seeing them!
(This post contains affiliate links. Thank you for supporting my blog!)
Materials:
- H (5mm) Hook
- 1 ball Premier Sweet Roll yarn (shown in “Root Beer”) or similar. You will use nearly the whole ball.
- Button (Pattern uses a 1.5” button, but this can be adjusted easily)
- Tapestry needle
- Scissors
- H (5mm) Hook
- 1 ball Premier Sweet Roll yarn (shown in “Root Beer”) or similar. You will use nearly the whole ball.
- Button (Pattern uses a 1.5” button, but this can be adjusted easily)
- Tapestry needle
- Scissors
- Bag is worked in joined rounds. Flap is worked in turned rows.
- Join each round with a slip stitch to the first stitch of the round.
- Chain 1 at the beginning of a round never counts as a stitch.
- Stitch counts are in parenthesis
- For a sleeve without the flap, work rounds 1-47 as normal. On round 48, work a decrease centered in each corner. Fasten off and weave in ends.
- This sleeve is designed for a 13” Macbook laptop. The dimensions are about 9” wide by 13.5” tall, not including the flap. The sleeve can be made larger or smaller by adjusting the starting chain and the number of rows.
Gauge:
1” = 4 rows. 1” = 4.5 stitches.
1” = 4 rows. 1” = 4.5 stitches.
Stitches & Abbreviations:
Ch – Chain
Sc – Single Crochet
St – Stitch
Sl st – Slip stitch
Ch – Chain
Sc – Single Crochet
St – Stitch
Sl st – Slip stitch
Pattern:
Sleeve -
Ch 29.
1. Sc in second ch from hook and in each ch across. 3 sc in last ch. Sc down other side of ch. 2 sc in last st. Join to first sc. (60 sc)
2. – 48. Ch 1. Sc around. Join. (60 sc)
Cut yarn.
Sleeve -
Ch 29.
1. Sc in second ch from hook and in each ch across. 3 sc in last ch. Sc down other side of ch. 2 sc in last st. Join to first sc. (60 sc)
2. – 48. Ch 1. Sc around. Join. (60 sc)
Cut yarn.
Flap -
Lay bag flat. Find right corner st. Attach yarn in the next st to the left of the corner st.
1. Ch 1. Sc 28 across. (Your last st should be in the st to the right of the next corner) (28 sc)
2. – 9. Ch 1, turn. Sc across. (28 sc)
10. Ch 1, turn. Sc 12, ch 4, skip 4 sts, sc in next 12. (24 sc, 4 ch)
11. Ch 1, turn. Sc 12, sc 4 in ch space, sc in next 12. (28 sc)
 |
| Flap placement: Centered on one side of the sleeve. |
Center button on front of piece at about row 37 (adjust for
your computer or tablet). Sew on.
Weave in ends.
Weave in ends.
This pattern and all photos are property of Mandie's Fiber Arts. Please DO NOT copy, repost, redistribute, or claim as your own this pattern or any of the pictures. If posting about the pattern, link back to the Ravelry listing or blog post and credit me as the designer. Feel free to tag me in social media posts with your creations. As always, you may certainly sell your finished projects.


Comments
Post a Comment