Introduction To Crochet: Slip Knot & Chain Stitch
Introduction to Crochet
Slip Knot & Chain Stitch
Slip Knot & Chain Stitch
Hi there! If you're wanting to learn the basics of crochet, this is the place to be! I hope you'll join me for a whole series on basic crochet stitches and finishing techniques.
If you haven't gotten your supplies yet, see my post about what you'll need here: Tools You Need To Get Started
If you haven't gotten your supplies yet, see my post about what you'll need here: Tools You Need To Get Started
First up, we'll cover the slip knot and chain stitch. The slip knot is the beginning step of almost every crochet project, and the chain stitch is also important for many patterns. I'll show you how to do both with detailed instructions and photos. Without further ado, let's get started!
This post contains affiliate links. Thanks for supporting my blog!

Notes:
Here are some basic notes and crochet terms you should know:
Tail: This is the cut end of your yarn.
Working yarn: This is the end of the yarn that is attached to your ball or skein of yarn.
Yarn Over: Wrap the working yarn around your hook.
Pull through: Pull the "yarned over" yarn through your stitch or loop.
I am using an H (5mm) hook and medium (4) weight yarn. I feel that is the easiest hook and yarn to learn with, and it's what I learned with too!
If at any point this seems confusing, just hang in there! Just take it stitch one stitch at a time and if you have any questions, feel free to comment.
I am a right handed crocheter. If you are left handed, I know this could get a little confusing. Try using the opposite hand I use for each step. If you have any questions, feel free to ask!
Slip Knot
Holding your working yarn in your left hand and the tail in your right, stick out your index and middle fingers of your left hand.


Wrap the tail around your fingers, making an X. On the back of your fingers, you'll have the yarn wrapped twice.

Using your hook, go under the loop on the right and grab the loop on the left. Then, pull it under the loop on the right.

Keeping your hook in the loop you've made, pull the knot tight. You'll notice that the knot will slip up and down the working yarn, and you can tighten it by pulling on the tail.
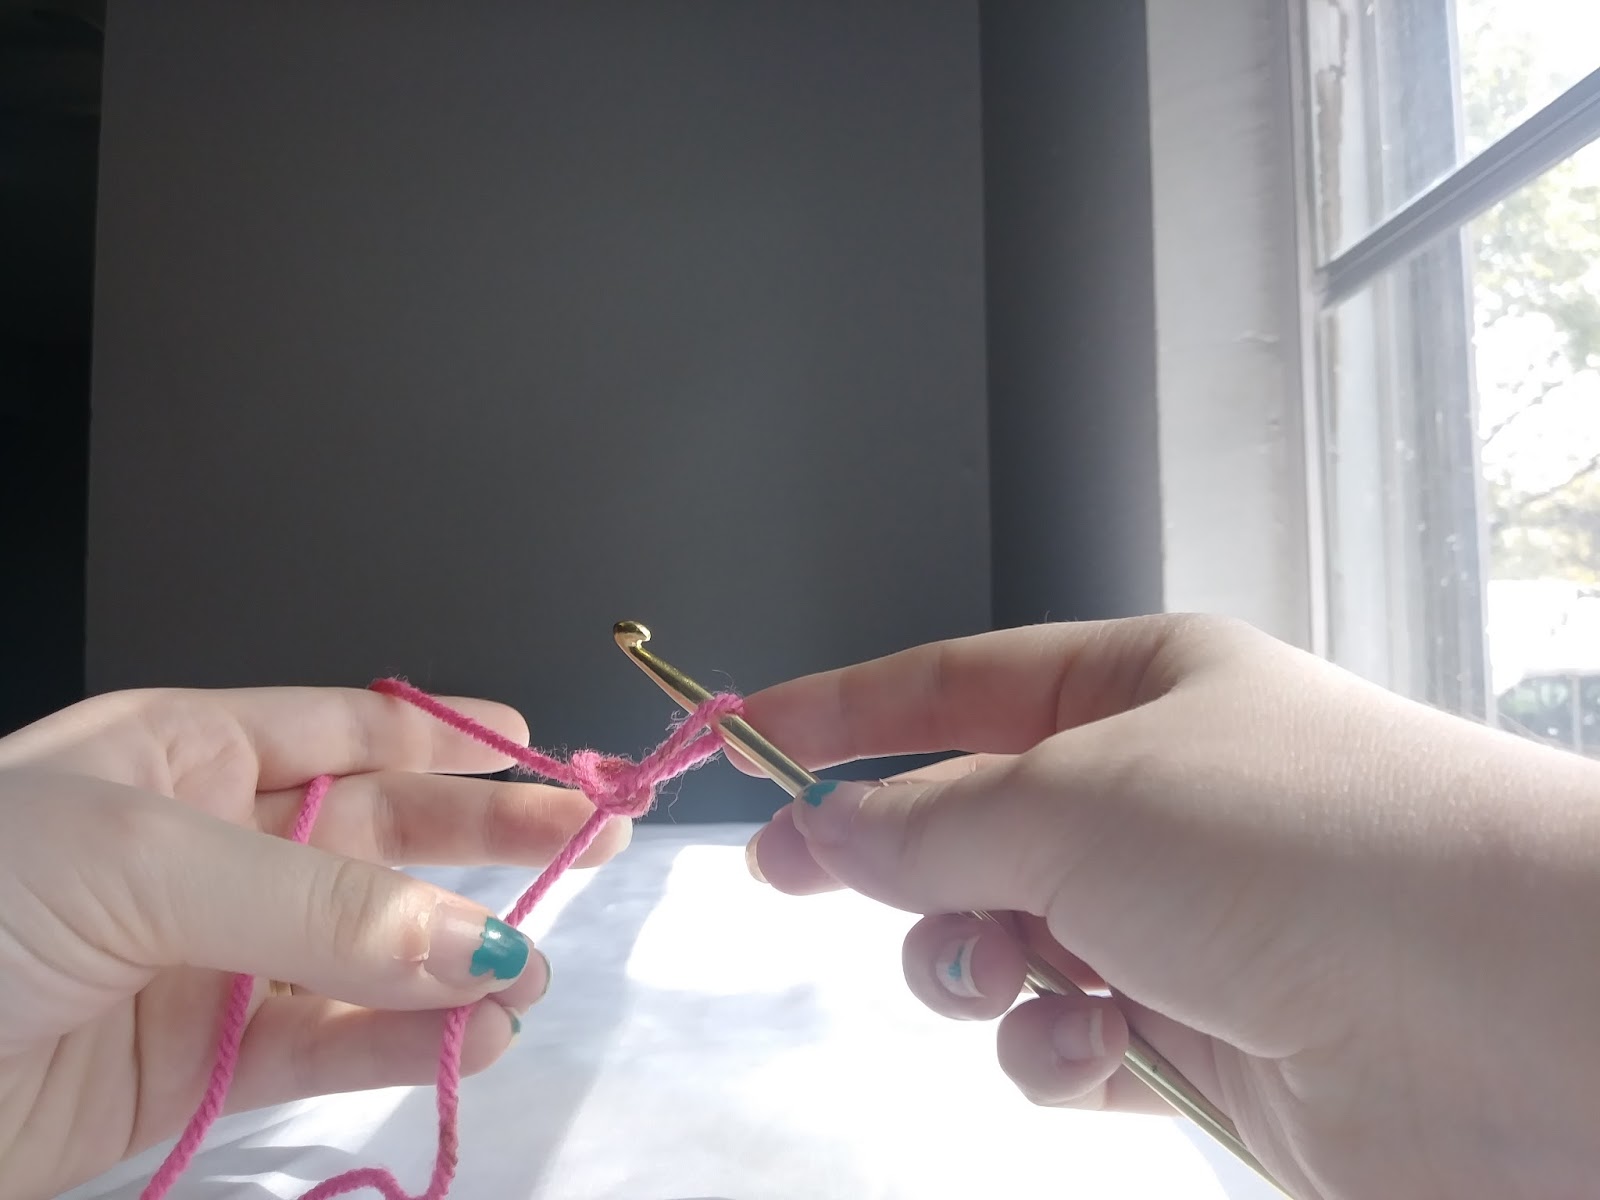
There! You've made a slip knot! I'll be honest, it took me a while to get the hang of this before I could do it with without watching a video. But now, I can do it without even thinking about it. It just takes practice!

Chain Stitch (ch)
After you have made your slip knot, you'll hold the working yarn in your left hand and the hook in your right.

Keep two fingers holding your slip knot to hold it in place, and wrap the working yarn around your hook. This is called yarn over, and you'll want to wrap the yarn around from back to front.
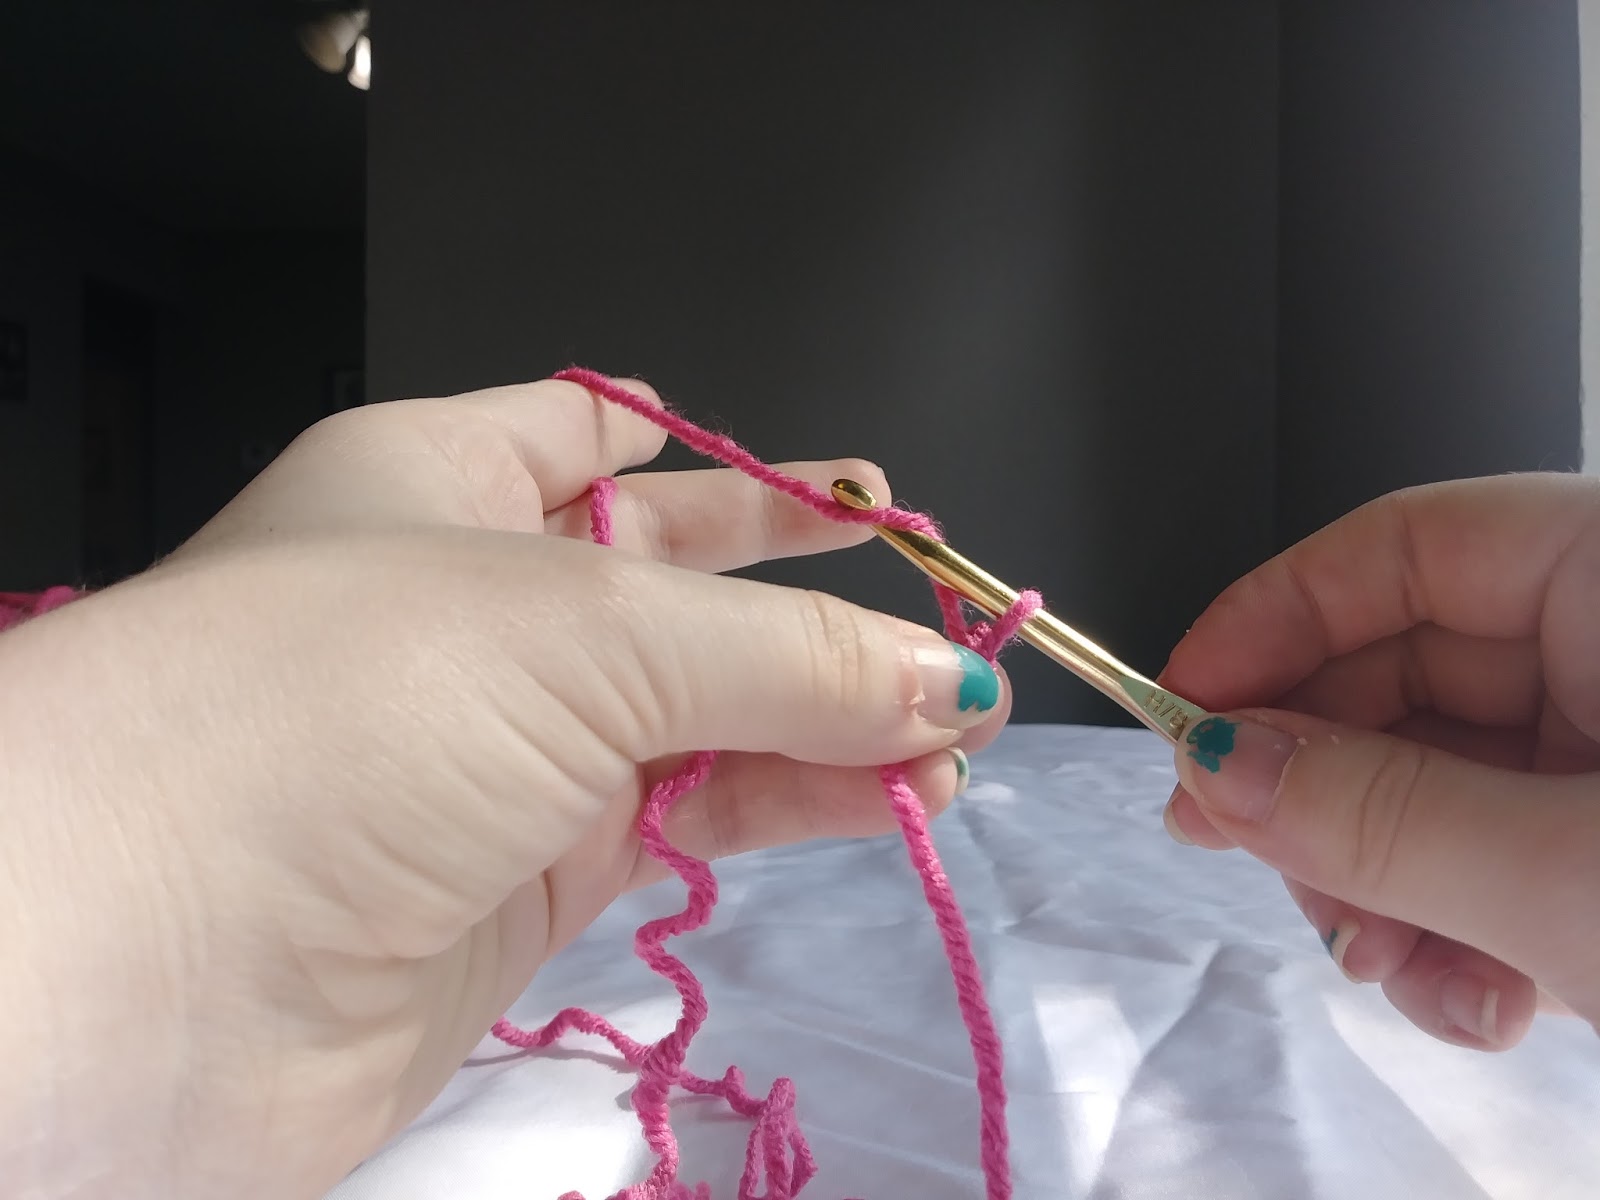
Pull it through the slip knot loop that is on your hook. That's one chain made!

You now have a new loop on your hook. To continue chaining, yarn over and pull the yarn through the loop on your hook. Remember to hold your existing chain in place, or it will slide around and get in the way.
Go ahead and make a bunch of chains, then see if you can count them. When reading a pattern, it will usually specify a number of chains to begin with, so identifying and counting them is important. They look like little Vs or chain links. Keep in mind that the loop on your hook after making a chain, does not count as a chain. See if you can count the chains I've made below.

If you counted ten, you're right! And that's how you start many crochet patterns! Keep practicing slip knots and chains, and I'll see you for the next tutorial, Introduction To Crochet: Single Crochet & Slip Stitch. Remember to let me know if you have any questions! I'm here to help!
If you enjoyed this photo tutorial, save it on Pinterest to keep it handy and to spread some crochet love!
Comments
Post a Comment